Guide on how to deploy your own FAF in OpenShift.
Deploy FAF in OpenShift
The following text will guide you through the process of deploying FAF in OpenShift and using it to collect crash reports from your machines. There are two options how you can do it. The first option is to use the command line, and the second one is to use the web interface.
Prerequisites
- OpenShift Origin or OpenShift Container Platform.
- Cluster admin rights for editing security context constraints, and managing volumes.
Command Line
- Create a new project.
oc new-project <project_name> - Add the FAF application.
We’ve created docker image with FAF, that you can find on Docker Hub.oc new-app abrt/faf-image:1.2.1 --name <app_name>This command will pull the image from docker hub and then deploy it.
- Edit Security Context Constraints.
The deployment won’t succeed because the FAF container requires usage of the root user, but default configuration doesn’t allow it. To allow the container to use of root, create a new service account and add it to anyuid’s security context constraints.oc create serviceaccount <sa_username> oc adm policy add-scc-to-user anyuid -z <sa_username> oc patch dc/<app_name> --patch '{"spec":{"template":{"spec":{"serviceAccountName": "<sa_username>"}}}}'Changing deployment configuration will trigger new container deployment. This time, it should succeed, and the FAF should be running. To make it accessible to external clients, you need to expose the service.
- Expose the service.
oc expose service <app_name> --path=/fafNow the service should be accessible to external clients on address you can get with:
oc get route <app_name>
Web Interface
It is also possible to deploy FAF through the web interface, except for editing security context constraints. You will need to use the command line for it.
-
Add FAF’s docker image to project. Use image name
abrt/faf-image:1.2.1.
- Create a new service account and add it to anyuid’s SCC.
oc create serviceaccount <sa_username> oc adm policy add-scc-to-user anyuid -z <sa_username> oc patch dc/<app_name> --patch '{"spec":{"template":{"spec":{"serviceAccountName": "<sa_username>"}}}}' - Expose the service.
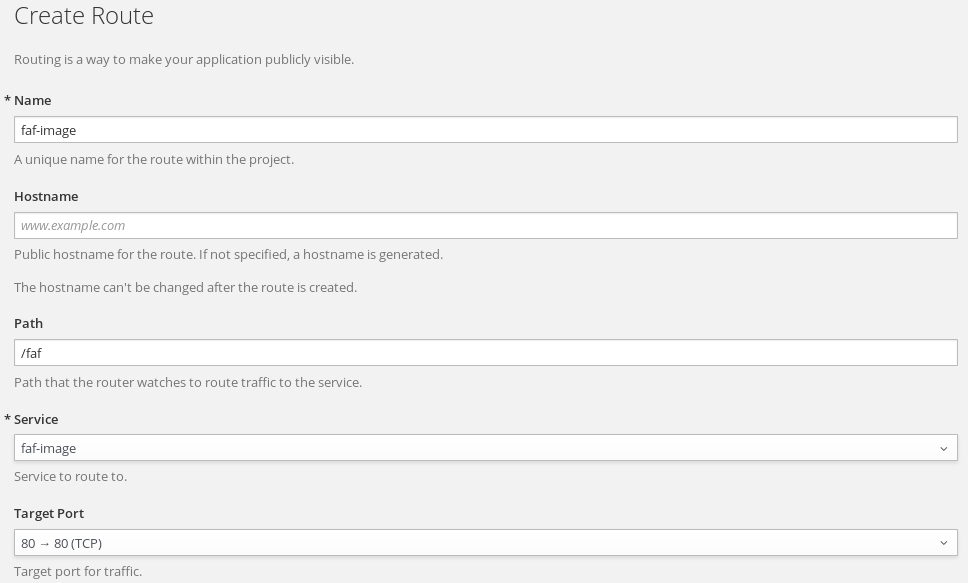
Applications->RoutesandCreate Route.
Persistent storage for FAF
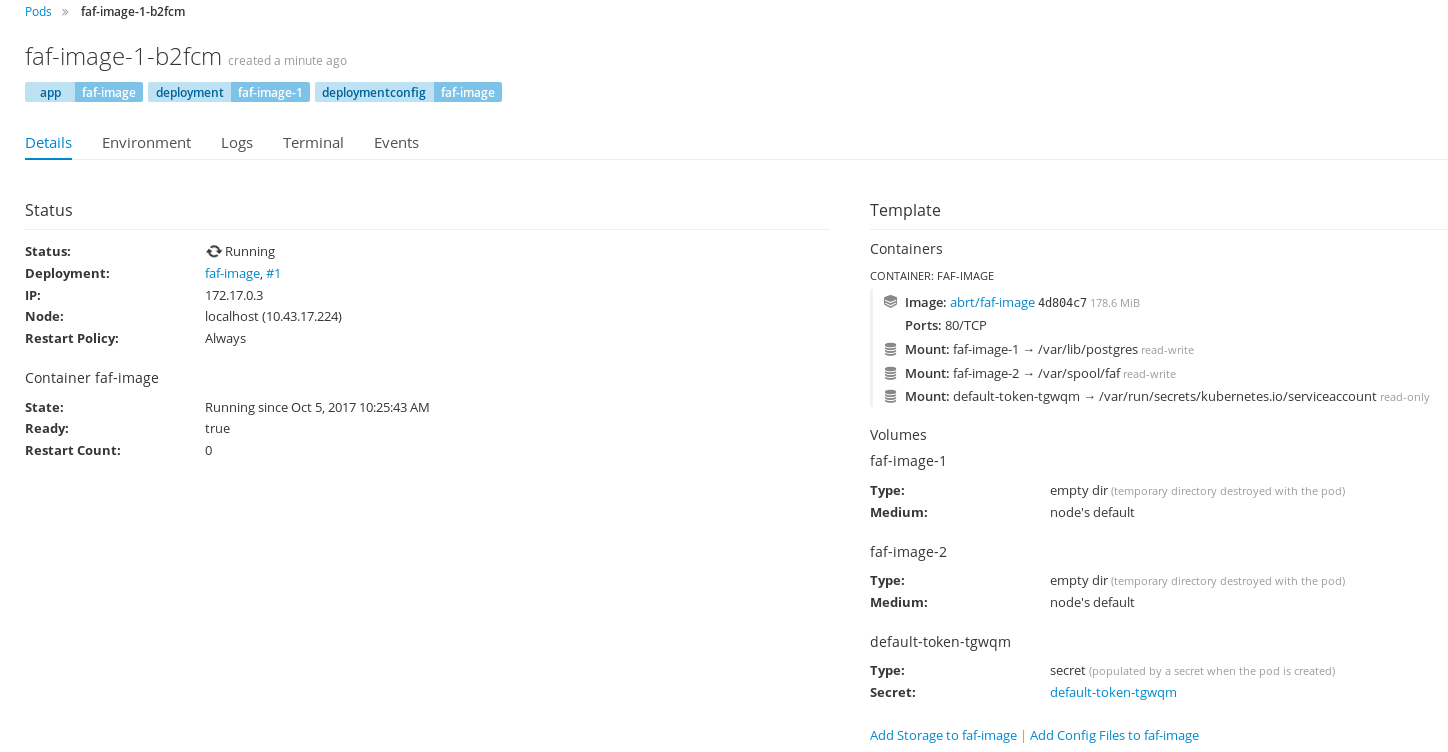
Containers are not persistent by default; their contents get cleared, when you restart them. Default claimed volume for the pod is EmptyDir, which is a ephemeral directory that will get cleared, once the pod is terminated. Again, you have an option to do this either using the command line or the web interface.
Command line
Update the volume configuration:
These commands will change the default EmptyDir volumes to persistent ones.
oc volume dc/<app_name> --add --overwrite --name=faf-1 -t=pvc -m=/var/lib/postgres --claim-name=faf-database --claim-size=5Gi --claim-mode="ReadWriteOnce"
oc volume dc/<app_name> --add --overwrite --name=faf-2 -t=pvc -m=/var/spool/faf --claim-name=faf-report-data --claim-size=5Gi --claim-mode="ReadWriteOnce"
Web interface
-
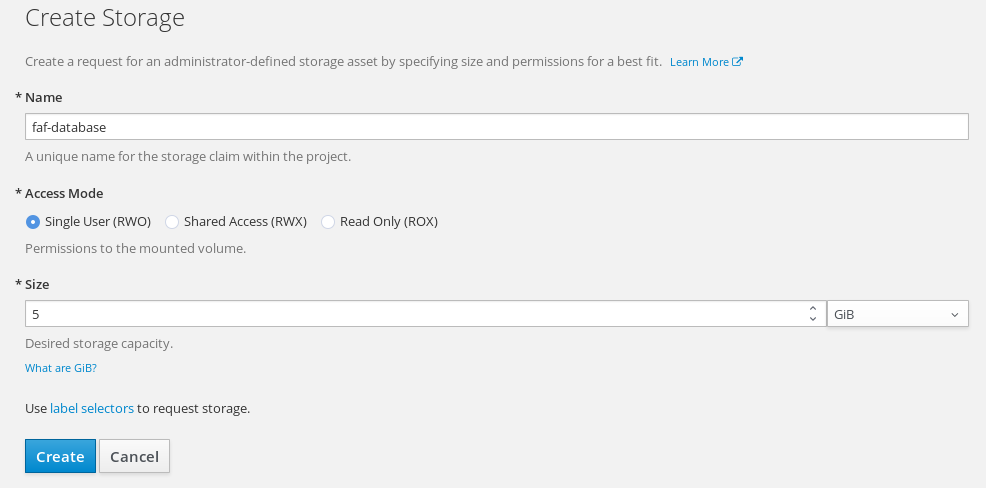
Create claims for storage. One for database and another for FAF’s data.
Storage->Create Storage
-
Remove mounted volumes.
Applications->Deployments. Then choose the FAF deployment and switch toConfigurationtab.
-
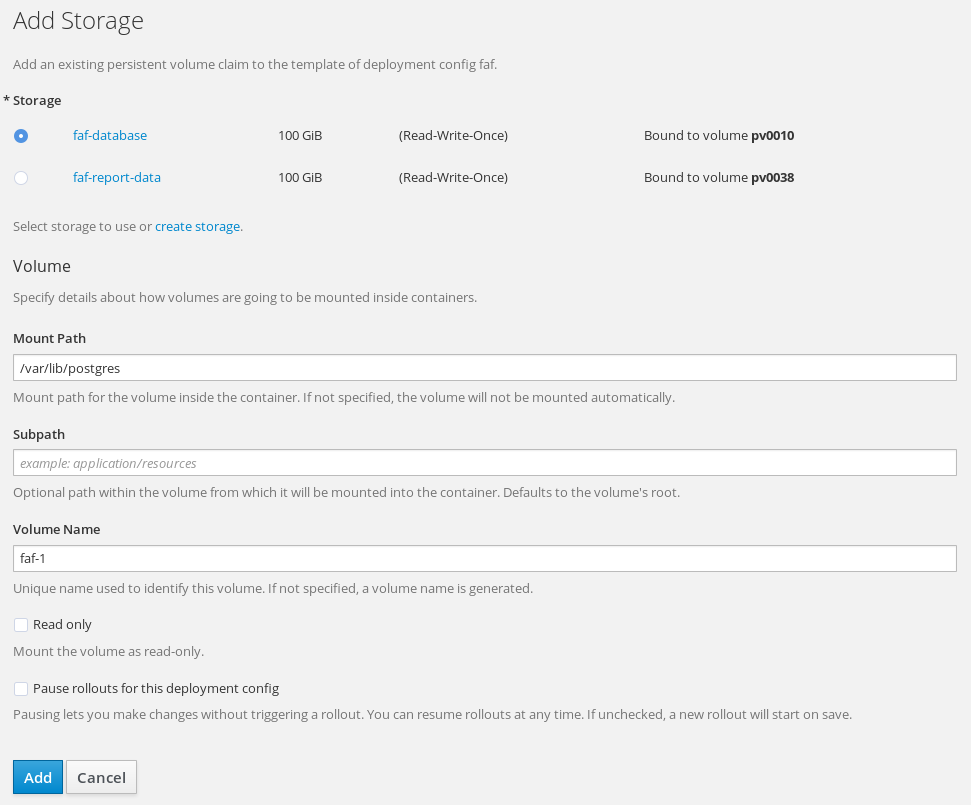
Add a new storage for the database and FAF’s data.
 The mount path for database is
 /var/lib/postgres, and/var/spool/faffor FAF’s data.
Reporting into deployed FAF
To be able to report to your newly created FAF instance, you will have to change µReport
configuration in /etc/libreport/plugins/ureport.conf on every machine from which you want to gather the crash reports.
You can utilize Ansible role ABRT client as stated here.
...
URL = http://<address>/faf
...
As was mentioned in the previous blog post, the crash reports from compiled packages will be less informative than those you can find on retrace.fedoraproject.org.

